
It's Surprisingly Easy to Make Marble Pumpkins With Nail Polish
Pumpkins are a blank canvas for creepy cut-outs, funny faces, and pretty designs. The endless options, however, also present a unique challenge: It's up to you to figure out if you want to go cute, spooky, funny, or classic with your pumpkin display. Not to mention, you have to decide whether you want to deal with the mess of carving pumpkins or take a less-messy approach with paint and glue.
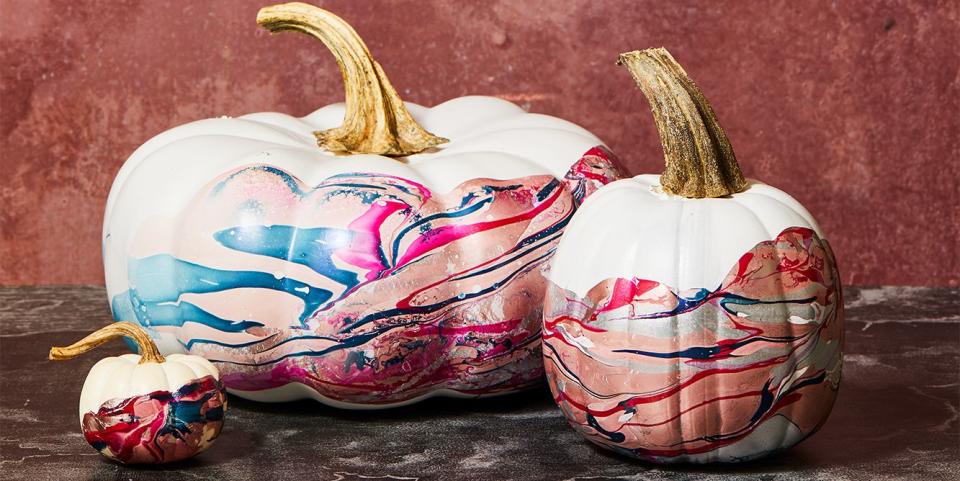
Luckily, this quick and easy DIY lays out the answer for you. These marbled pumpkins, which can be customized with different nail polish shades, are a simple way to add color to your front porch, stoop, or home's interior this Halloween. You can go as bold, glittery, or neutral as you'd like, and even pick nail polish colors that match the rest of your Halloween decor for a seamless look. Although you can't go wrong with most color combinations, try to mix nail polish shades in different tones (cool and warm) and textures (metallic and matte) to achieve a more eye-catching piece.
Stick to artificial pumpkins — white, black, orange, your call — so that you can put your marbleized beauties on display year after year. Because if you're going to put in the work now (no matter how easy it is), you might as well reap the benefits during all the Halloweens to come.
Step-by-Step Instructions for Marbled Pumpkins
Fill plastic container with warm water. (FYI: Use one that you don't mind getting dirty or stained.)
One by one, pour different colors of nail polish onto the water. Try to pour as close to the surface as possible to make sure the nail polish floats.
Swirl colors together with a skewer to create a marbled effect.
Moving quickly, dip the part of the pumpkin you want painted into the nail polish and water mixture.
Lift the pumpkin out of the water and let excess nail polish drip off. Set pumpkin aside to dry completely.
Repeat for each pumpkin.
You Might Also Like
