
This hidden Windows feature recreates one of my favorite Mac features — how to enable it
I wrote recently about why I use Mac for work and Windows for play, and a lot of it came down to the built-in tools that macOS offers which make Macs so much better for productivity out of the box.
There's things like the default bulk renaming tool, the default snipping tool and the Mac'sbuilt-in PDF editor, Preview.
While I still prefer macOS for work for various reasons, a lot of the issues I have with Windows 11 are, as many reading this will know, fixed by Microsoft PowerToys: a suite of official Microsoft tools that make life easier for power users and people using Windows machines for general productivity. I use PowerToys a lot on my Windows PC, but one tool that totally slipped past me was Quick Accent.
Another great built-in feature of macOS is that you get access to any accents for a keyboard character when you hold down that key. This is great if you're typing in multiple languages or using a borrowed word with an accent, giving you access to characters that your keyboard doesn't have a key for.
Quick Accent brings that capability to Windows. Better yet, it's easy to enable and use. Want to find out how to enable Quick Accent for yourself? Simply read on.
How to type accents on Windows 11 with PowerToys
Before we get started, you'll need to have access to Microsoft PowerToys. Here's how to get PowerToys on Windows 11, if you need a pointer.
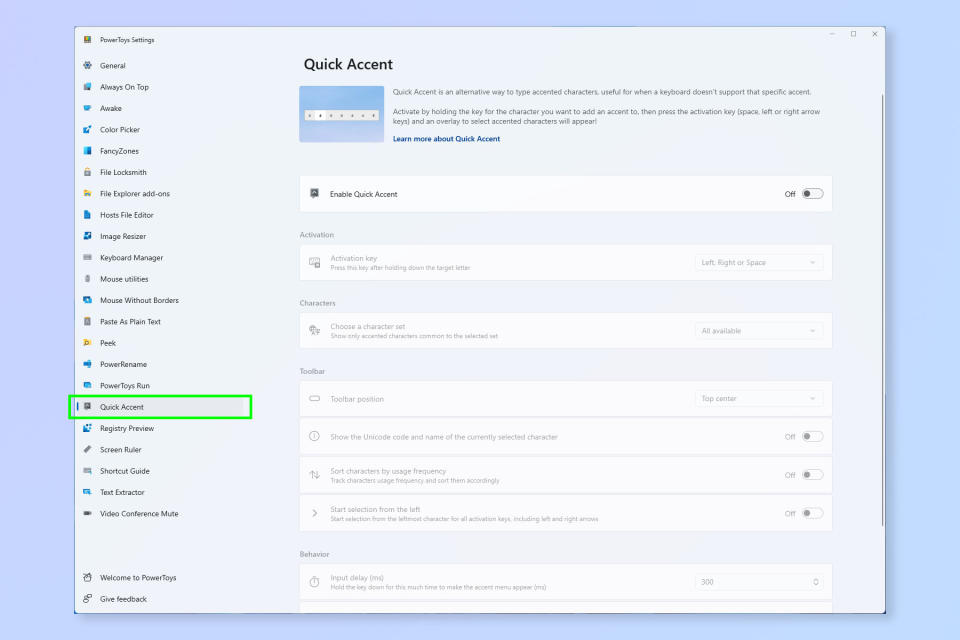
1. Open PowerToys and click Quick Accent
(Image: © Future)
First up, open PowerToys and click Quick Accent in the left-hand menu.
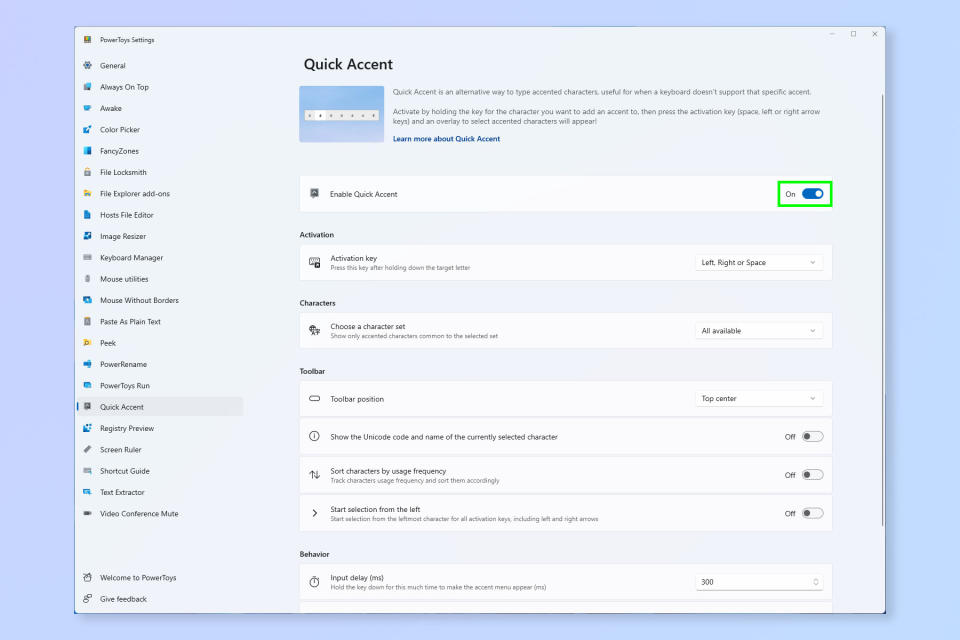
2. Toggle Quick Accent on
(Image: © Future)
Toggle Quick Accent on using the switch next to Enable Quick Accent.
3. Select your Activation keys

(Image: © Future)
Now choose your activation keys. This is what you press (in addition to the letter you want accented) to bring up the accent menu. By default, you can use the left arrow, right arrow or the space bar.
There are more settings below which you can play around with to your preference, such as setting where the accent bar appears.
4. Press and hold a letter key while pressing the activation key

(Image: © Future)
Now press and hold the letter you want accented, while at the same time pressing your activation key (e.g. space). Don't hold the letter key too long before pressing the activation key, as you'll type lots of that letter. Quick Accent will only replace the last letter with the accented version.
When you see the accent menu pop up at the top (or wherever you have set it to appear), use the left and right arrow keys to select an accent.
There are lots more ways to use PowerToys. Check out our guides on how to change the default keyboard shortcuts on Windows 11, how to remap keys in Windows 11 and how to use PowerRename in Windows 11 — all of these tasks use Microsoft PowerToys!

