
Here’s an Easy DIY Fix to Jazz Up an Old Cabinet
I am trying to look on the brighter side of things during these days of sheltering in place—most of all, I’m learning to embrace the fresh-slate Mary Poppins feeling that seems to come with staying home. When all of your hours are spent indoors, checking off every chore on your decluttering list becomes a breeze. Plus, it’s super satisfying after the fact! But while getting organized is great, I’ve also learned that it’s important to have some fun too. So whether you’re sick of looking at the same surroundings or just in need of a creative project that doesn’t involve alphabetizing the spice cabinet, there’s no better time than right now to switch up your style at home. And playing with color and pattern is the easiest place to start. I decided to take the DIY plunge last weekend with a vintage Hollywood Regency china cabinet in my bedroom—I backed the shelves with a beautiful green-and-blue toile wallpaper. It was so simple to execute, and I love that it’s now become a focal point of the room. So read on for how to tackle this project yourself—here’s hoping it will inspire you to spruce up something in your own home too.
What You’ll Need
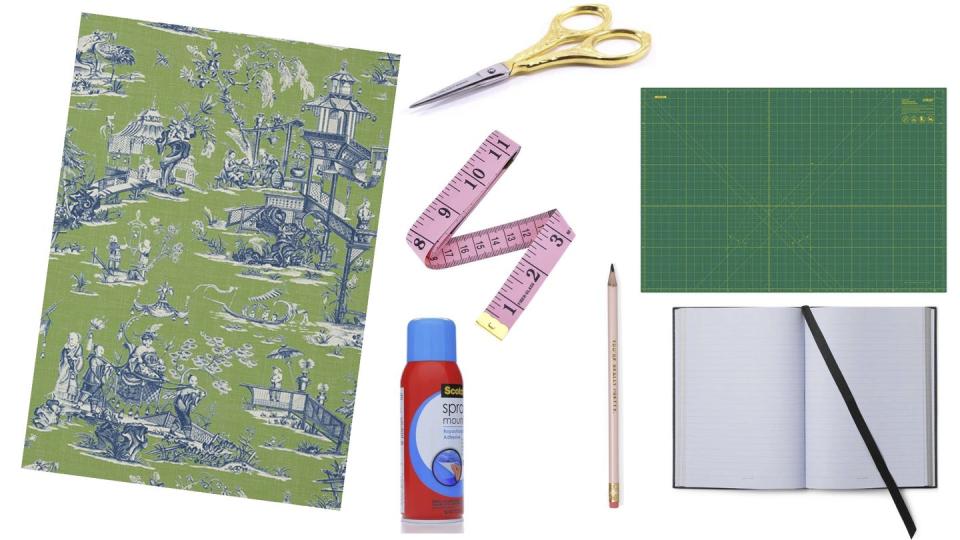
Roll of wallpaper
3M Spray Mount Repositionable adhesive
Measuring tape
Scissors (or blade cutter)
Rotary mat (or ruler)
Pencil and paper
Getting Started
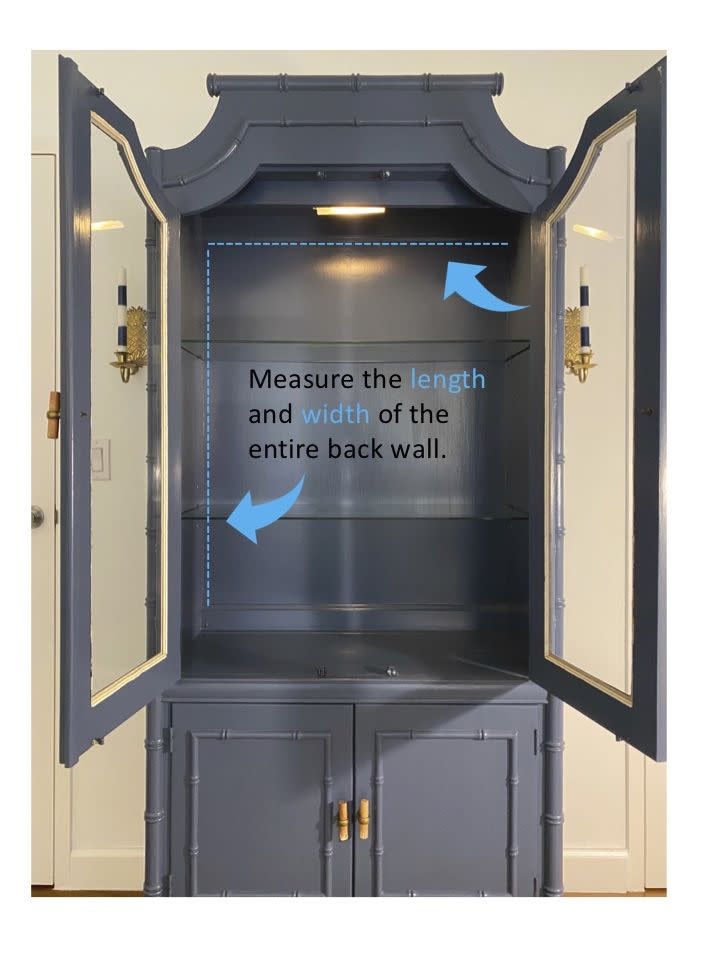
• Remove everything from the shelves and give it a good once-over with a multipurpose cleaner so that you’re working with a clean, dust-free surface. (Be sure it’s completely dry before you begin mounting the wallpaper.) If your cabinet has removable shelves like mine, take those out and set them to the side. If they don’t come out, then repeat the below steps for each shelf back individually.
• Grab your measuring tape and and write down the full length and width of the back wall. You’ll use these measurements to cut the wallpaper.
Measure and Cut
• Take the wallpaper and lay it out on a large, flat surface. Mark the panel on the back side with a pencil at the length of the back wall. Turn the panel over and use your rotary mat or a ruler to draw a pencil line on which to cut. Then use your scissors or blade to cut along the line.
• Wallpaper panels will vary in size—mine was 27 inches across. Since your cabinet may be wider than that, you’ll need to match up a second piece of wallpaper next to it. For my 31-inch-wide cabinet back, I needed another 4-inch-wide piece to cover the whole area.
Match Up Your Panel Pieces
• Once you’ve found your repeat below the first cut, measure the full length down again and cut all the way across again. You’ll be using the far-right 4 inches of the second panel to match up to the far-left side of your first panel. So for my cabinet, the first panel was 38 inches long by 27 inches wide, and the second was 38 by 4 inches.
Attach the Wallpaper
• Take your can of 3M Spray Mount (be sure to get the repositionable one to account for errors) and spray the entire back side of your first panel. Holding it by the top, bring it up to the cabinet wall, match up the top corners so they align with the top of the cabinet, and press down firmly. Move one hand down to hold the bottom of the panel, and use the other to smooth it all the way across the top. Work your way down the panel with that hand in a snakelike motion, continuing to smooth the paper as you go. Once you’ve reached the bottom, grab your rotary board or ruler and comb down the paper from top to bottom. If the corners are lifting up, apply a bit more spray adhesive and hold them down for several seconds. Now take your second piece and repeat these same steps, making sure that the pattern aligns at the seam as you go.
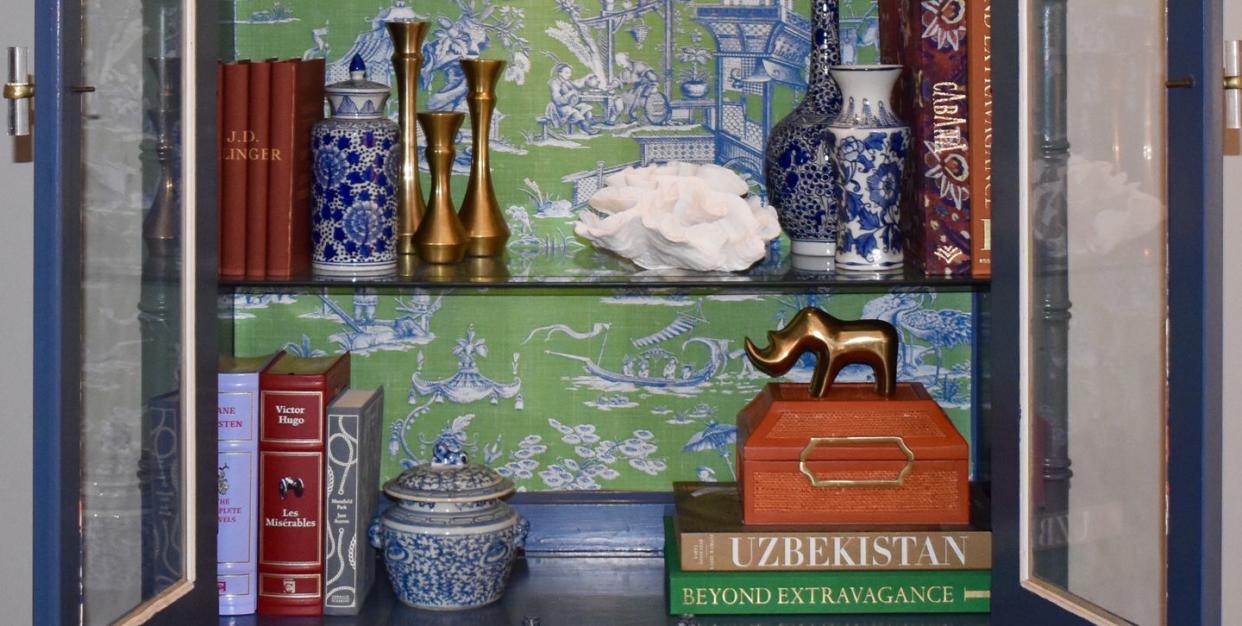
Style Your Shelves
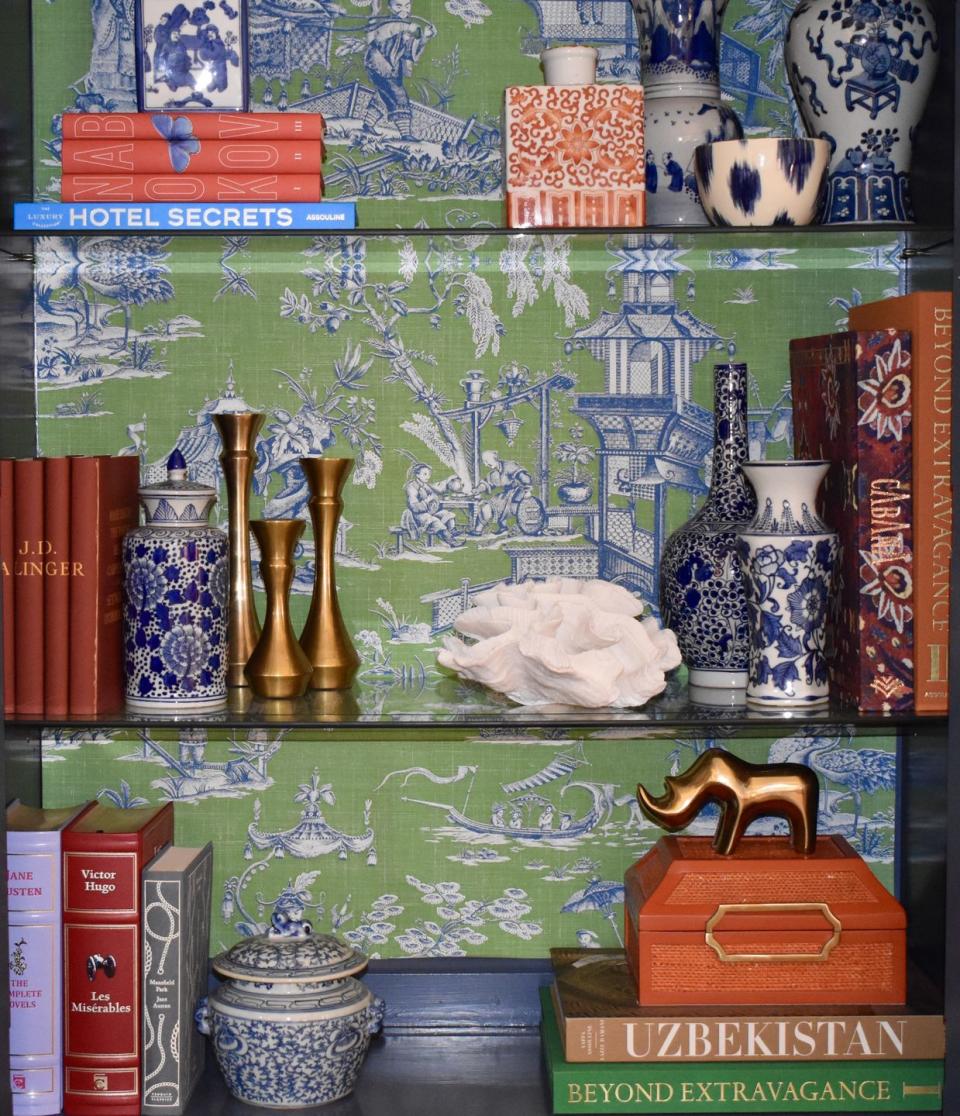
• Your accessories should complement, not detract from, the wallpaper. Keep your color palette limited—and don’t overstuff the shelves. A good mix of shapes and sizes is key; this goes for everything from vessels and vases to books. A hit of brass is always beautiful, and you can never go wrong with classic chinoiserie. Shop my shelves below!
You Might Also Like

