
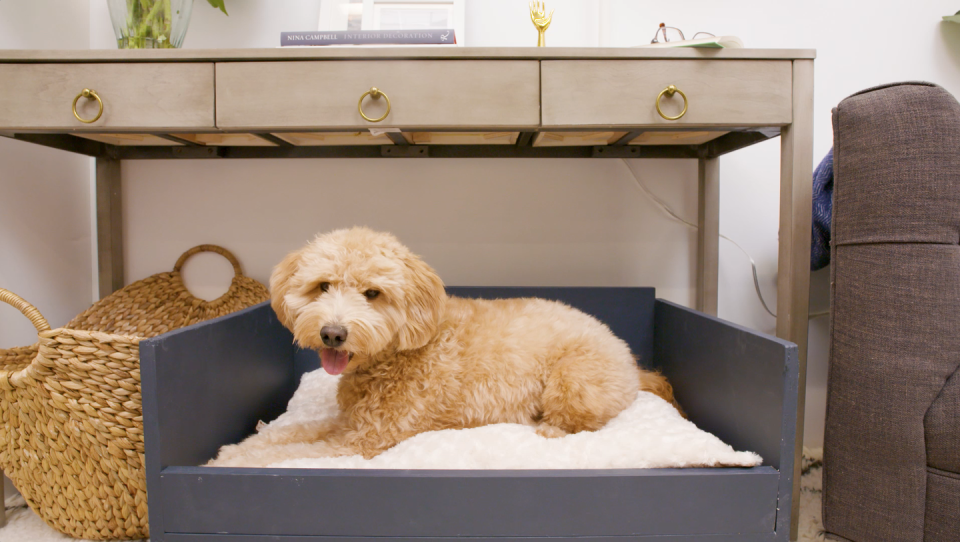
This DIY Dog Bed Looks So Much More Expensive Than It Is—Here's How to Make It

Of all the things that can throw off a living room aesthetic, an unsightly dog bed takes the cake. But we're not suggesting investing in a super high-end, ridiculously expensive dog bed. As it turns out, building your own dog bed that's just as comfortable and stylish as any store-bought version is a lot easier than it may sound. We put it to the test by building our very own midcentury modern-inspired dog bed. Keep reading to learn what supplies you'll need and then follow the step-by-step directions to make your own. We promise it's a win-win-win situation for your pet, bank account, and living room feng-shui.

What you'll need:
Plywood
Paint (we used Benjamin Moore's Hazy Blue in a matte finish)
Kilz Primer
Circular saw
Pencil
Measuring Tape
Paint Roller
Paint Brushes
Wood Filler
Sandpaper
Wood Screws
Drill
Step-by-step directions:
First, measure the cushion so you can use those dimensions to guide your wood-cutting.
Purchase and cut plywood to size, accommodating for sides, back and lip of the dog bed frame. (In our case, we used an 18" x 23" pillow, so the base is 18" x 23", the back is 10" x 23", the sides are 18" x 10" and lip is 3" x 22".) Novice DIYers should use a hardware store that offers cut-to-cut wood and to purchase sealed plywood for easier painting.
Once you cut your wood, prime and paint it your color of choice.
Using your wood screws and drill, mount each side to the base. Then mount the back to the base.
Secure the hairpin legs to the base using shorter screws and the drill.
Next, mount the lip to the front of the base.
Once everything is secure, plaster over the screws to even out the surface, and then touch up all those areas with paint.
And finally, once the paint dries, add the dog cushion.
Follow House Beautiful on Instagram.
You Might Also Like

