
How to get correct color profile for your monitor on Windows 11
On Windows 11, similar to any operating system, accurate color rendering on the screen is critical, even more for those professionals working on video editing, photography, or gamers. As a result, in this guide, you will learn the steps to set the correct color profile for your monitor.
A color profile is a combination of settings that manufacturers create to describe how colors should be rendered on the display. Only after setting the correct profile will you be able to experience the intended color representation.
Although the operating system can detect and configure the appropriate profile if you notice that the colors don't look accurate, the problem is probably not the monitor but rather the profile, which you can update from the Color Management application available on Windows 11.
In this how-to guide, I will walk you through the steps to use the correct color profile on Windows 11 version 24H2, 23H2, and older releases.
How to download color profiles for a display on Windows 11
Usually, the color profiles ("ICM" or "ICC" files) available for your monitor come in the driver package or the installation disc. However, you can always download the files from the manufacturer's website.
To find and download the correct color profile on Windows 11, use these steps:
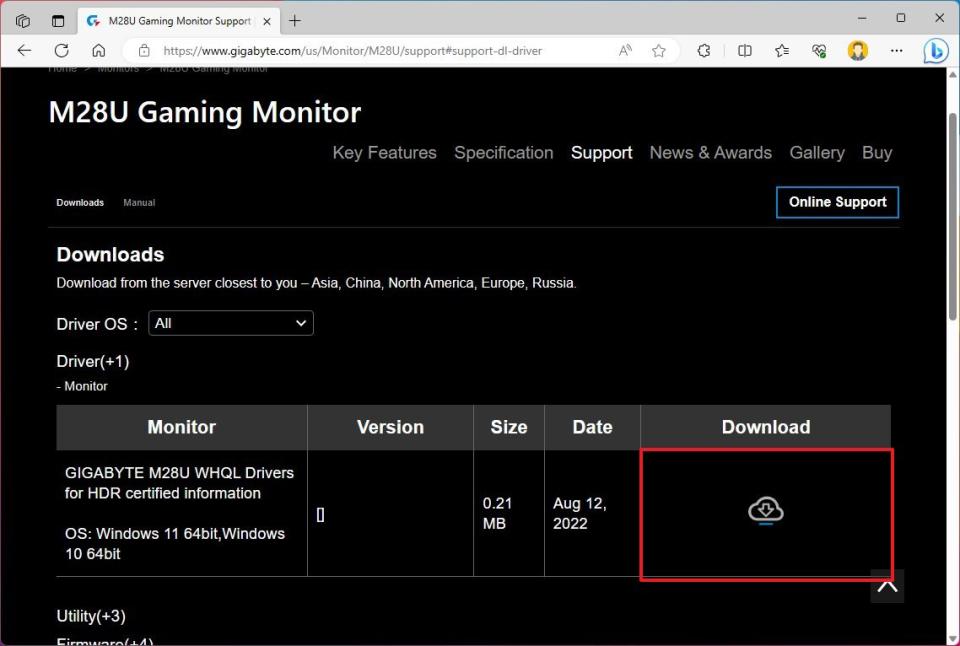
Open the monitor's support page.
Browse to the download section.
Search for the latest monitor driver (not the graphics driver) using the model number of your device.
Quick tip: You can find the monitor model number on the back of the device or, on Windows 11, open Settings > Displays > Advanced display.
Click the Download button and save the file on your computer.
Double-click to open the file.
Click the Extract all button from the command bar (if this is a Zipped folder).
Continue with the on-screen directions to extract its content.
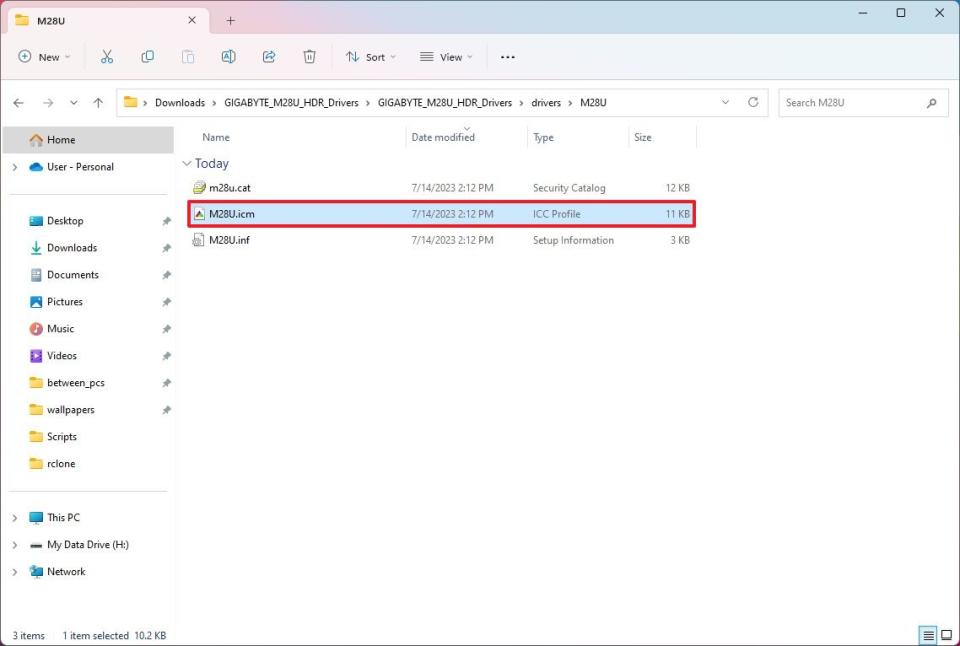
Open the folder with the extracted files.
Confirm the ".icm" file, which is the color profile for your monitor.
Once you complete the steps, you can install the appropriate color profile for the computer's monitor on Windows 11.
How to install color profiles for a display on Windows 11
On Windows 11, you can install and manage color profiles from the "Color Management" tool or from the Settings app starting with version 24H2 and higher releases.
Steps for Windows 11 2023 Update
To install a color profile on Windows 11 (version 23H2 and older releases) from the legacy Color Management settings, use these steps:
Open Settings.
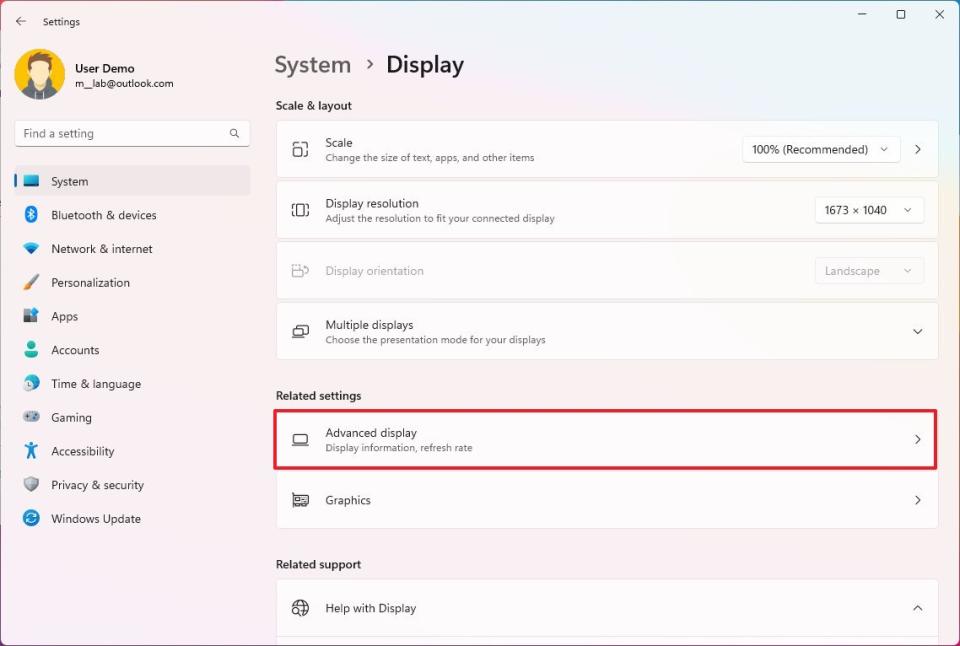
Click on Display.
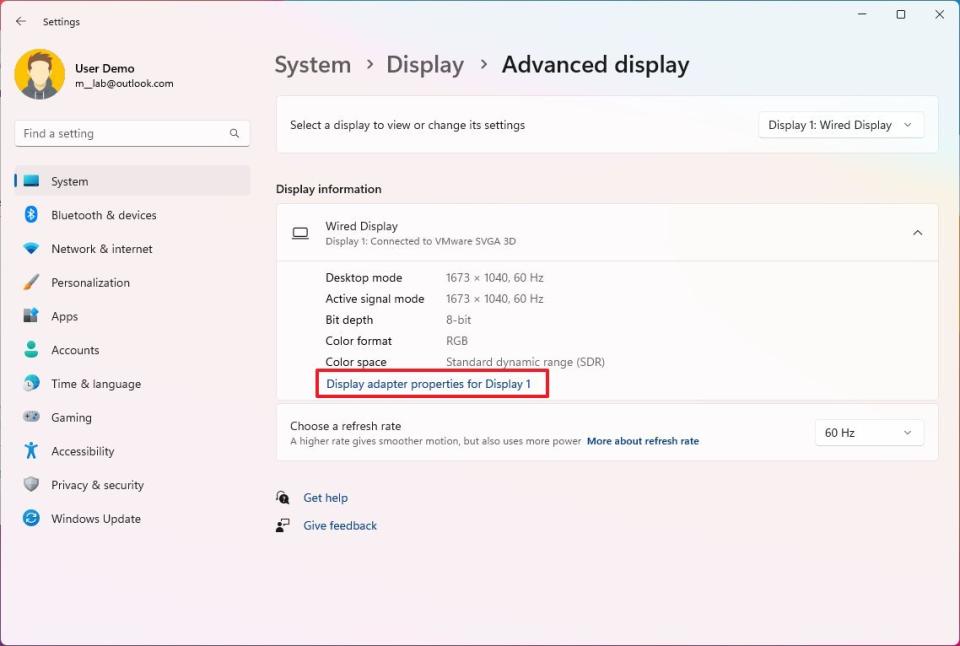
Under the "Related settings" section, click the Advanced display setting.
Under the display settings, click the "Display adapter properties for" settings to graphics adapter properties.
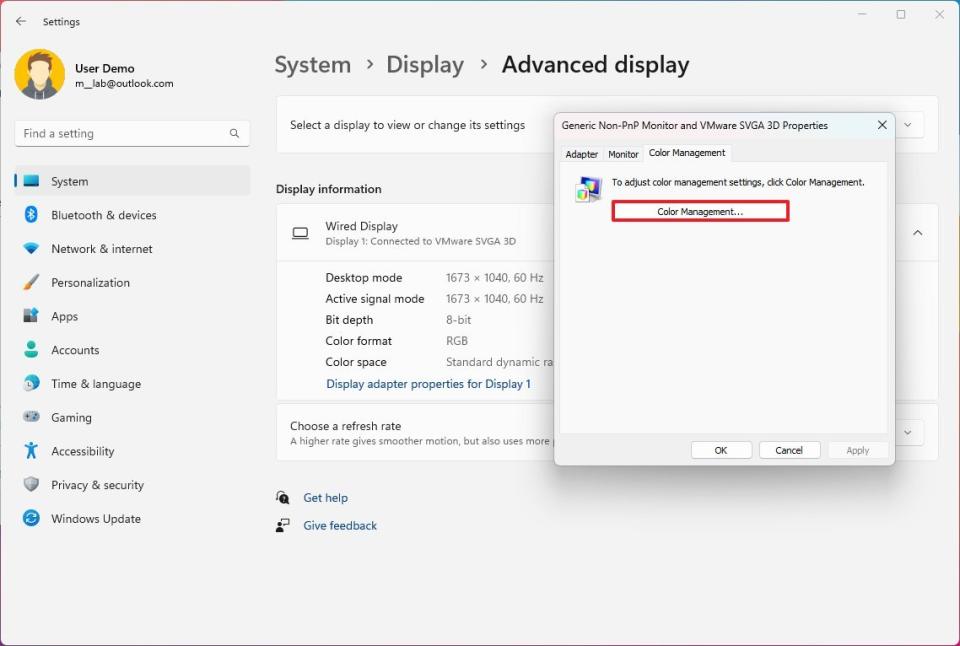
Click the Color Management tab.
Click the Color Management button.
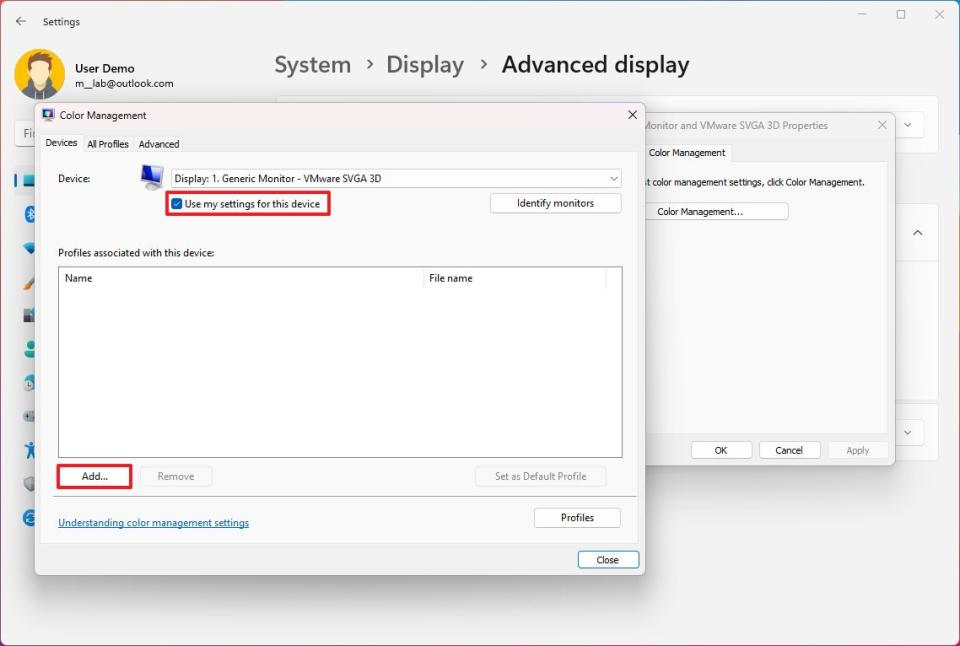
Click the Devices tab.
Choose the monitor to apply a new color profile using the "Device" setting.
Quick tip: If you have a multi-monitor setup and you're not sure which monitor you're about to update, click the "Identify monitors" button.
Check the "Use my settings for this device" option.
Click the Add button.
In the "Associated Color Profile" page, click the Browse button.
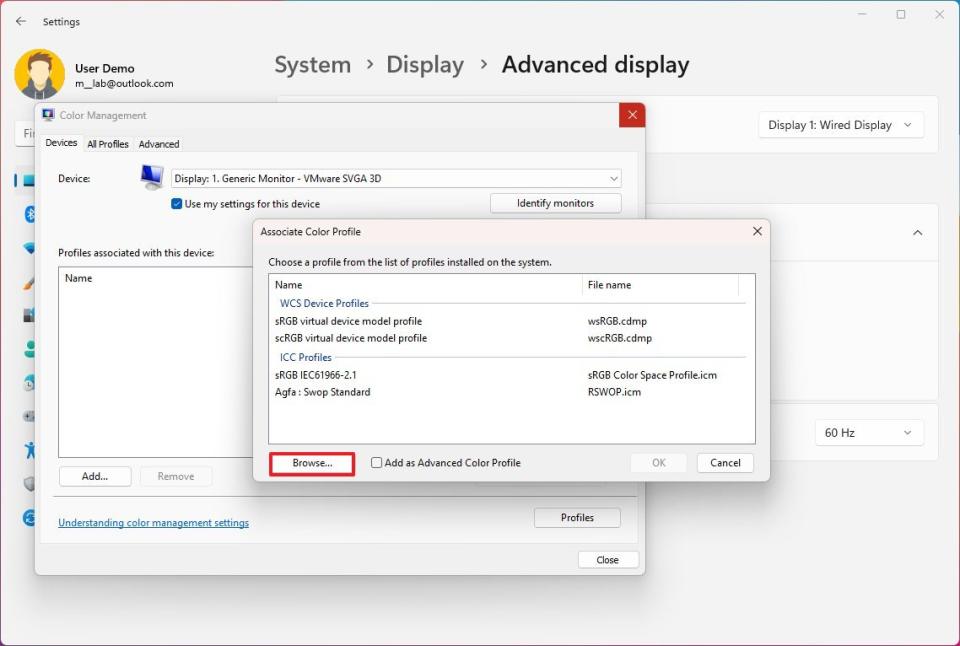
Open the folder with the color profile file.
Select the ".icm" file.
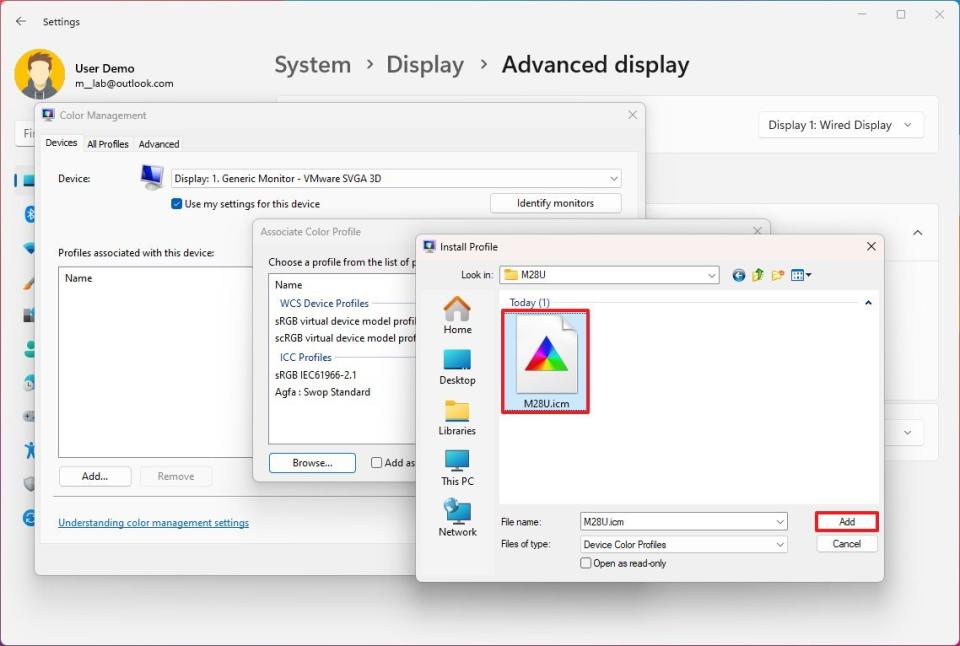
Click the Add button.
Click the Close button.
After you complete the steps, the profile will apply, and you should now be able to notice a change in how the display renders colors.
If you want to remove the specific profile, follow the same instructions, but in step 9, select the profile from the list and click the "Remove" button. However, the file containing the profile instructions will continue to be available on your computer. You can refer to the reset instructions to remove it.
Steps for Windows 11 2024 Update
To install a color profile on Windows 11 (version 24H2 and higher releases) from the modern Color Management settings, use these steps:
Open Settings.
Click on System.
Click the Display page on the right side.
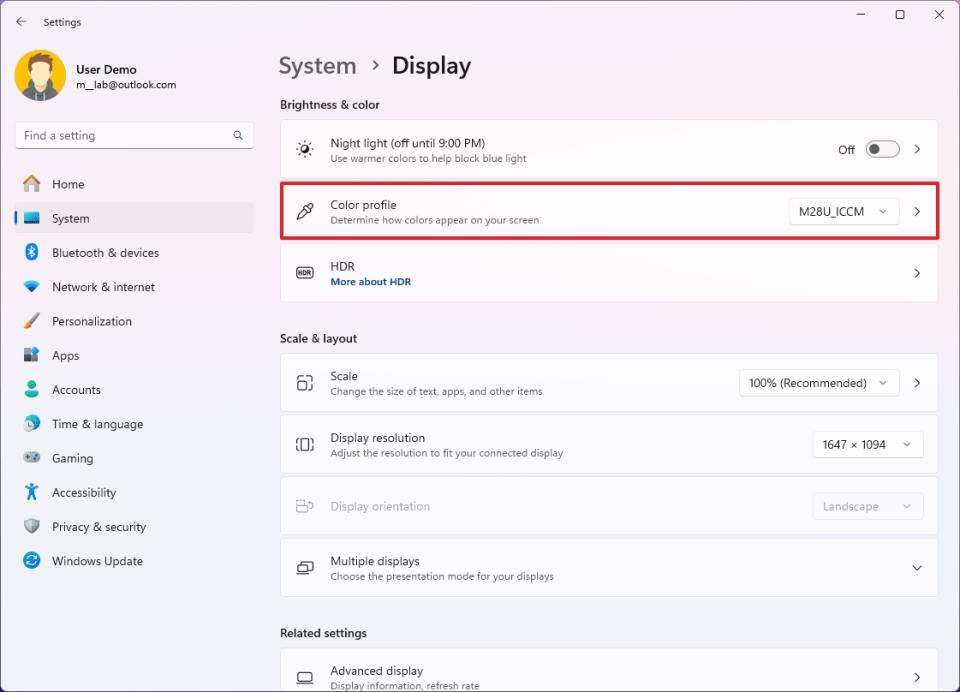
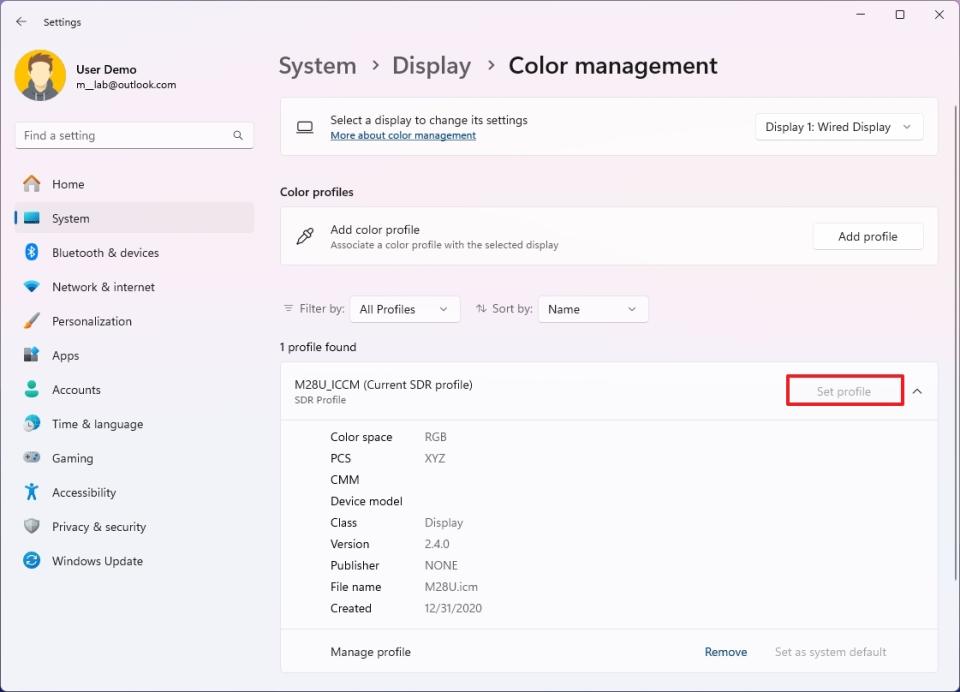
Click the Color profile setting under the "Brightness & color" section.
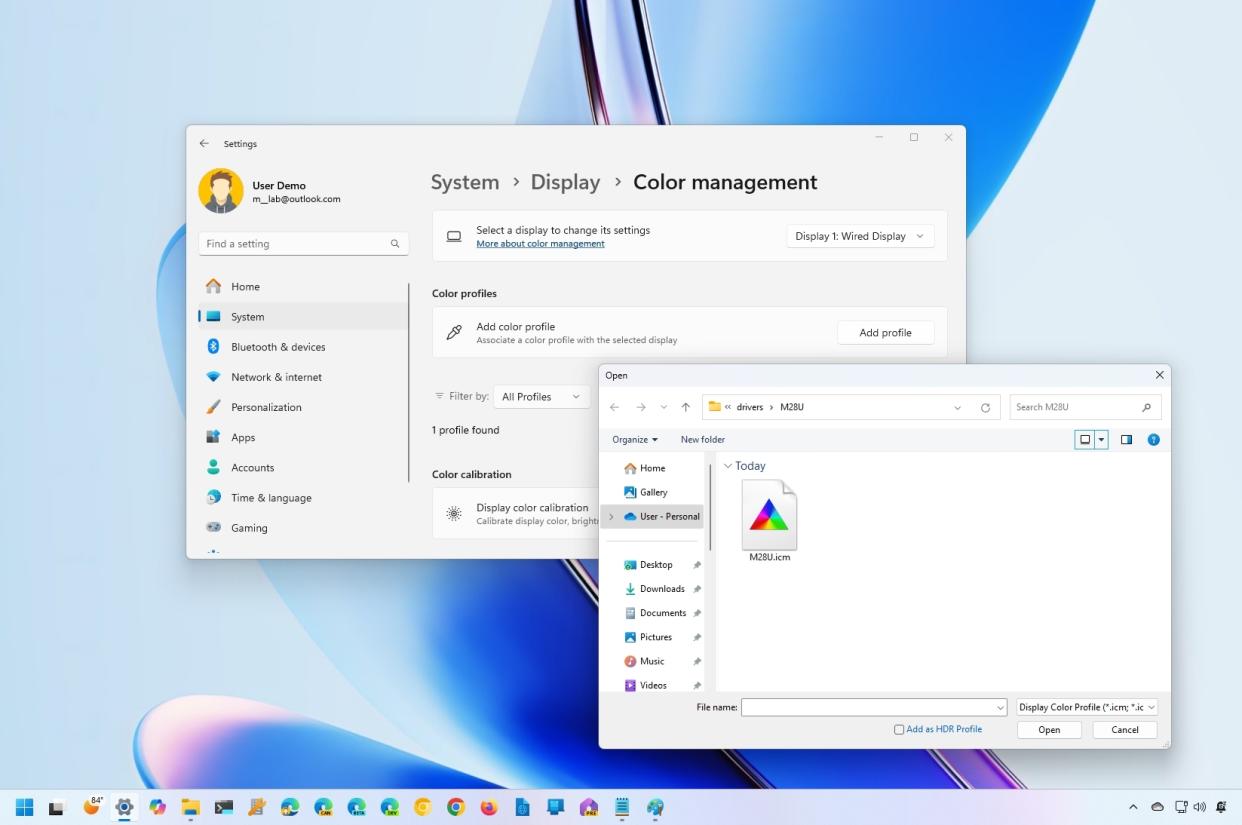
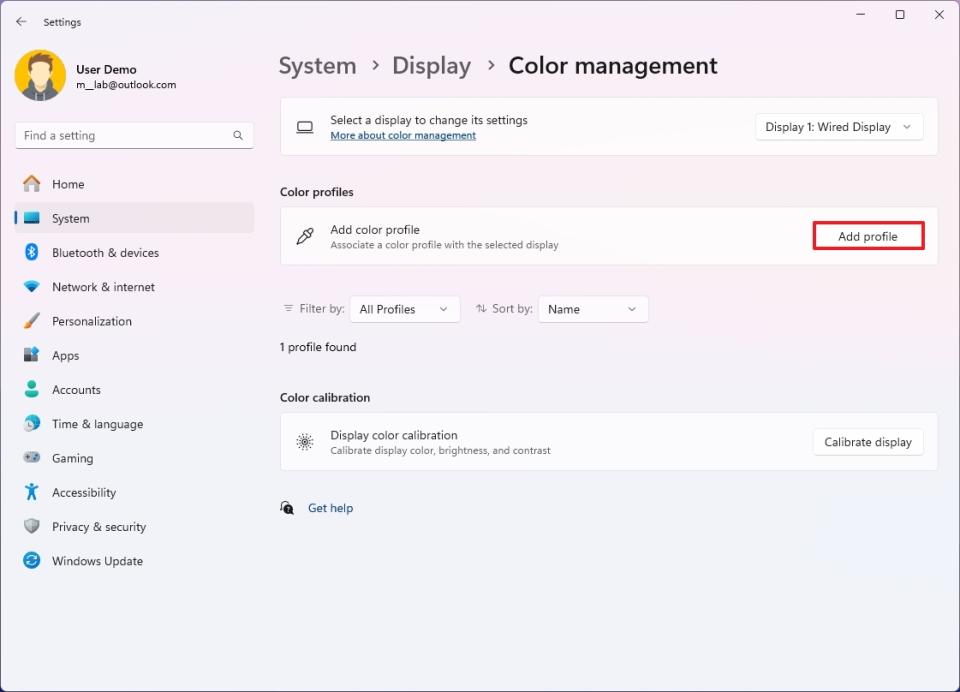
Click the Add profile button in the "Add color profile" setting.
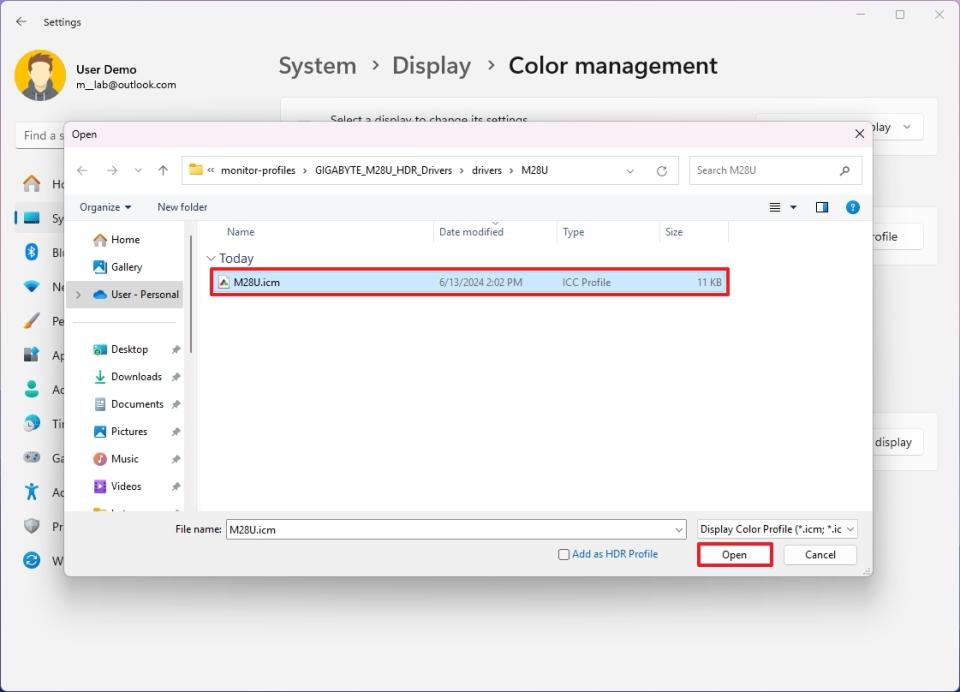
Choose the profile file with the "icm" or "icc" extension.
Click the Open button.
(Optional) Click the profile setting to review the different details like color space, version, file name, and more.
(Optional) Click the Set profile button if you have multiple profiles.
Once you complete the steps, the new profile will be applied to your computer.
If you want to remove the specific profile, follow the same instructions, but in step 9, click the "Remove" button. However, the file containing the profile instructions will continue to be available on your computer. You can refer to the reset instructions to remove it.
How to reset color profile settings on Windows 11
In the case that you need to roll back the previous settings, you can use the instructions below to reset to the default color profile configuration on Windows 11 version 24H2, 23H2, and older releases.
To reset the color profile to the default settings, use these steps:
Open Start.
Search for Color Management and click the top result to open the app.
Click the Devices tab.
Click the Profile button.
Select the monitor to reset using the "Device" setting.
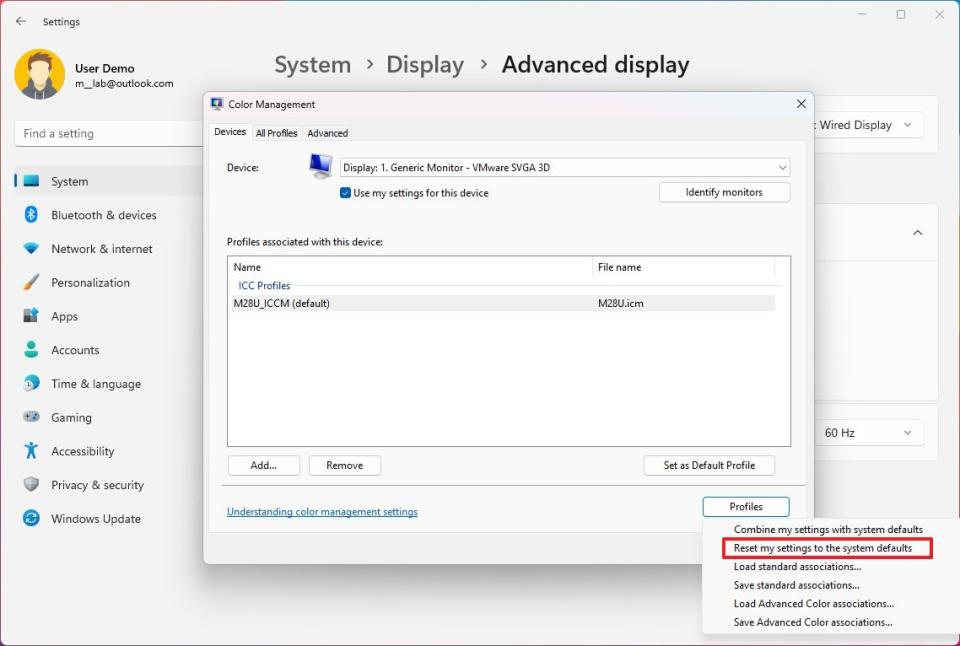
Click the Profiles button and choose the "Reset my settings to the system defaults" option.
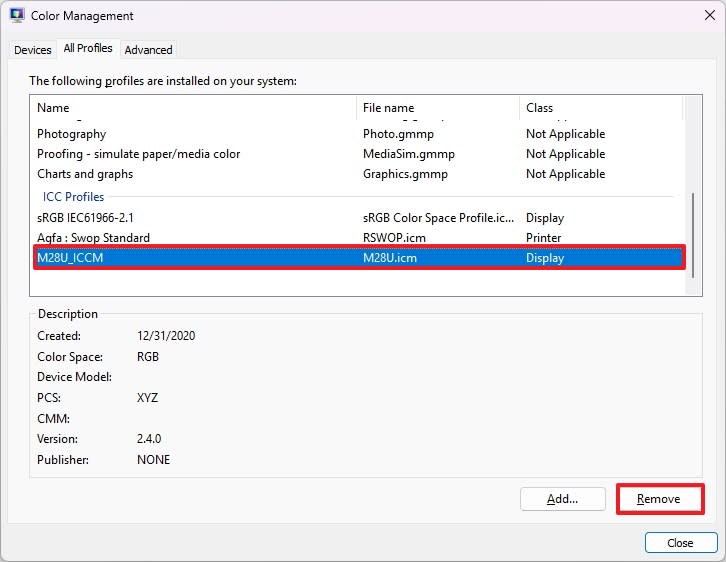
(Optional) Click the All profiles tab.
Select the profile you want to remove.
Click the Remove button.
Once you complete the steps, the profile settings will roll back to the original configuration for that specific monitor.
It's important to note that even though you can configure a custom profile for your monitor manually, typically, when you connect a display to the computer, the system sets up the recommended color profile. As a result, you should only consider using these instructions if the device is using the wrong profile or you have specific requirements to change the color profile on Windows 11.
More resources
For more helpful articles, coverage, and answers to common questions about Windows 10 and Windows 11, visit the following resources:

