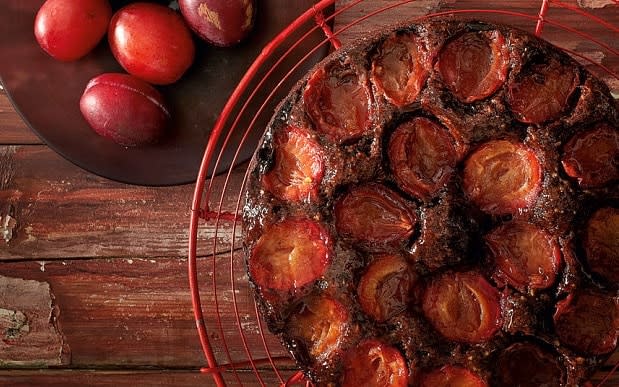
Chocolate and plum cake recipe
Prep time: 25 minutes | Cooking time: 1 hour 20 minutes, plus cooling
SERVES
10
INGREDIENTS
500g plums (not too big)
175g hazelnuts
50g dark chocolate (70 per cent cocoa solids)
175g butter, at room temperature
175g soft dark-brown sugar
3 eggs, at room temperature, lightly beaten
125g self-raising flour
1¼ tsp baking-powder
50g cocoa powder
1½ tbsp demerara sugar
4 tbsp plum jelly
Dash of plum brandy or regular brandy
METHOD
Preheat the oven to 180C/170C fan/gas mark 4. Grease and base-line a 23cm springform cake tin.
Halve and stone the plums. Toast the hazelnuts in a dry frying-pan, then leave to cool, and grind in a food processor. Chop the chocolate into small chunks (the size of chocolate chips).
Beat together the butter and sugar until fluffy and light in texture. Add the eggs a little at a time, beating well after each addition.
Sift together the flour, baking-powder, cocoa powder and a pinch of salt. Fold the flour mixture into the eggs and butter, followed by the hazelnuts and chocolate. Scrape into the tin.
Smooth the surface and arrange the halved plums on top, cut-side up, and sprinkle on the demerara sugar.
Bake for an hour and 10 minutes. A skewer inserted into the cake should come out clean, but test in several areas because the plum juice will make parts of it moist. You may need to return it to the oven and retest after a further five minutes.
Leave in the tin to cool for about 20 minutes, then unclasp the tin but leave the cake on the base. Cover with foil and leave overnight – this cake tastes better the next day when it has had a chance to settle.
Carefully transfer the cake from the base on to a serving plate. Heat the jelly and brandy to boiling-point, then pull off the heat and leave to cool a bit, but don’t let it set again. Brush the top of the cake with the jelly and allow to firm a little before serving.